Remove a Photo Distraction Without Changing the Story
Define a narrow edit, remove one distraction in Quby Image Editor, and compare the export with the untouched source.
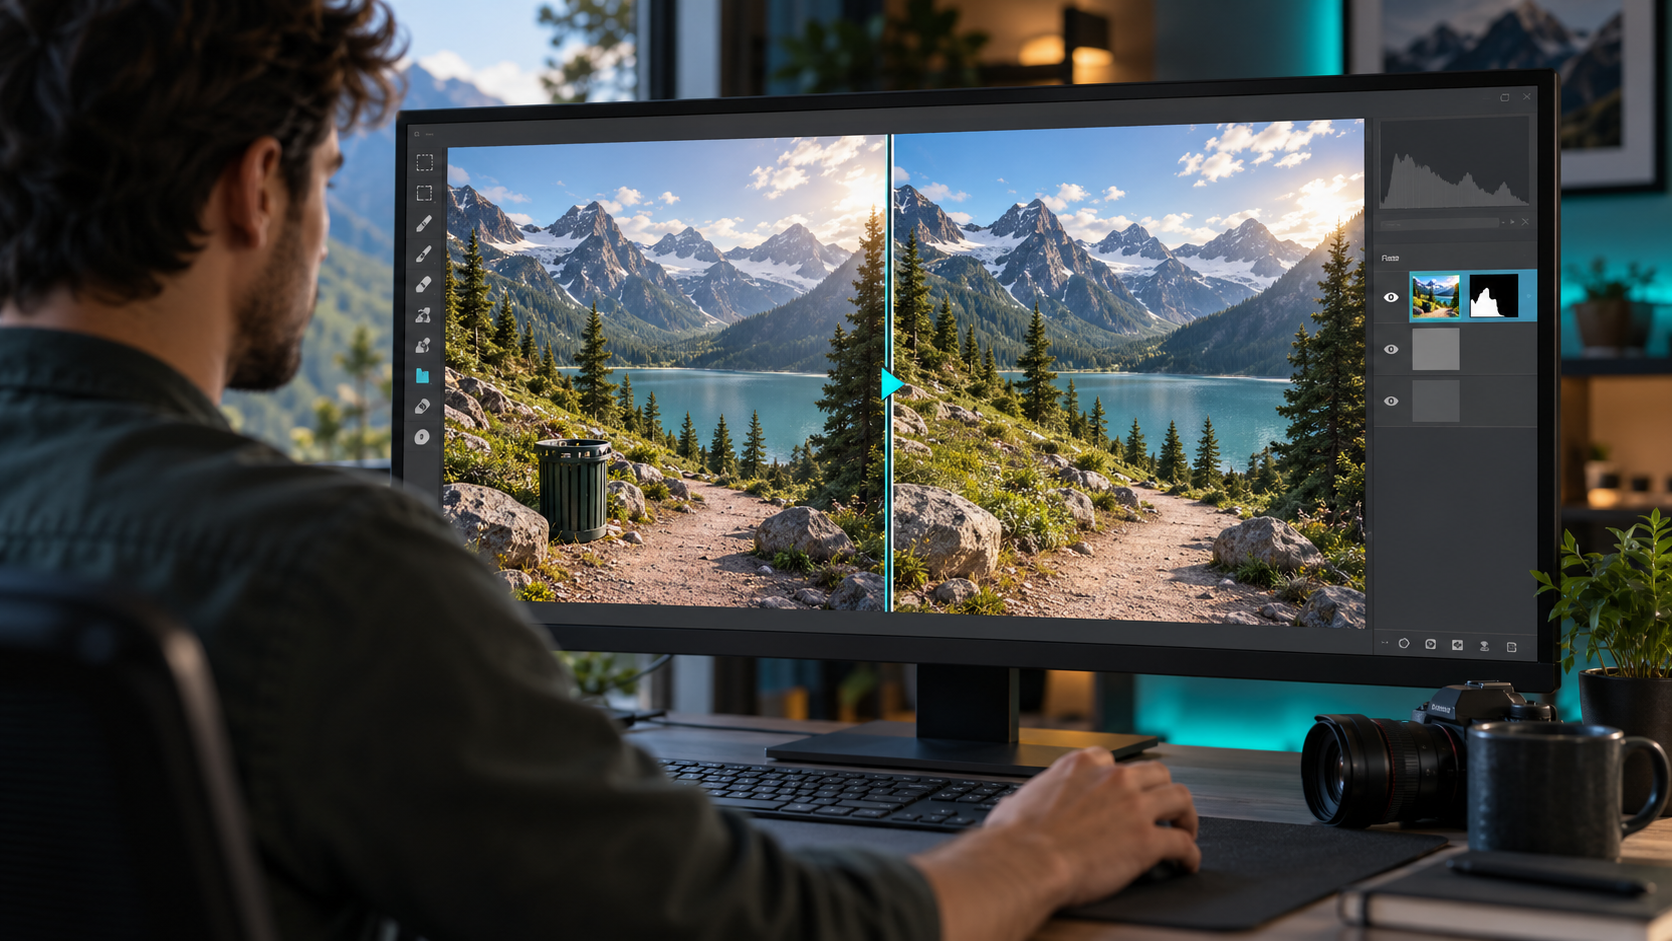
Removing a distraction from a travel, product, or event photograph is easy to describe and surprisingly easy to overdo. A bin near the edge of a landscape is one thing; removing a person, sign, safety barrier, or product defect can change what the photo tells viewers. Set an editing boundary before opening a tool, then review the filled area at full size and in context.
Quby Image Editor is the editing route here. Its public page lists object removal, generative fill, layers, and a prompt-based workflow. The general principle is also visible in Adobe's official object-removal guide: select the unwanted object and fill the area from surrounding image information. The tools differ, but the same visual question remains: did the replacement make a believable, truthful image?
Decide what may be removed
Write an edit brief in ordinary language. For a travel website hero, it might read: "Remove the small trash bin from the lower right of this licensed trail photo. Preserve the hikers, trail surface, fence, mountain outline, weather, and colors." That is far safer than "make this scene perfect." It limits the edit to one region and names the visual evidence that must stay.
Consider the intended use. A decorative hero image can often remove a stray object with appropriate disclosure under your organization's policy. A news photograph, property condition record, safety demonstration, or product listing has a stricter truth requirement. If the object is material to the story, leave it or choose another photograph. A beautiful fill is not permission to misrepresent what was there.
Keep an untouched original and record the editor, date, and changed region. That makes later correction possible. Use a source image you own or have rights to modify. For photographs of people, respect consent and context; removing someone from an image can be more consequential than removing a bin.
Edit one small region in Quby
Open Quby Image Editor, sign in if requested, and upload the approved image. The public Quby page describes a prompt-based editing path and an Object Removal feature. Locate the relevant control in your current account; interface names and model availability may change. If the editor offers a selection or mask, include the object's shadow where appropriate but avoid sweeping in unrelated trail texture.
Use a precise instruction such as:
Remove only the small trash bin and its shadow from the lower right. Fill the area with the nearby trail and grass. Do not change the hikers, fence, mountain, sky, lighting, or camera framing.
Generate or apply one candidate, then stop to inspect. A longer prompt that also asks to relight the sky, enlarge the mountains, and remove every passerby makes it impossible to tell what changed. If the first fill fails, revise the selection or simplify the instruction before trying again. Do not publish the first plausible preview automatically.
Compare the edit with the original using a side-by-side view. Look for repeated rocks, grass with an impossible pattern, a broken fence rail, an interrupted shadow, or a blurred patch that becomes obvious at export size. Check the scene as a whole: is the eye drawn to the patch because its color or texture is different? Then inspect the boundaries at full resolution. Object removal often fails at transitions between ground, horizon, and other structured lines.
Choose a smaller fix when needed
If the replacement does not hold up, crop the image only when the crop preserves the intended subject and does not hide something material. Another option is to select a different source photograph. For a complex obstruction that covers important structures, a conventional manual edit may be more reliable. Quby's Image Editor also describes smart crop and layer management, but the best route is the one that produces a truthful, reviewable output.
Avoid turning a documentary image into an illustration without saying so. If you use a generative fill to invent a large missing region, readers may reasonably assume the photo shows a real place as captured. For editorial, legal, or scientific work, follow the applicable image-manipulation rules and keep the original available. This is an editorial judgment beyond any tool's technical ability.
Check the final exported file
Export the image in the size and format the destination needs. Review the export, not only the editor preview. Compression can reveal seams; a social crop can move the filled area to the center. Open the file on both a larger screen and a phone-sized preview. If text will be laid over it, ensure the edited area does not create a misleading visual cue behind the headline.
For a team handoff, add a short note: source file, rights owner, region removed, reason, reviewer, and approved export. You do not need an elaborate workflow system for one image, but a clear before-and-after pair prevents accidental reuse of an unapproved draft. If the image appears in a campaign, retain the exact version that was published.
Adobe's Delete and Fill Selection documentation is useful for understanding why context matters: a fill draws on surrounding content. Quby's method may differ internally, so do not assume identical controls or results. The practical test is whether a narrow edit preserves the parts of the photo that matter.
Bring a rights-cleared photo and a one-sentence edit boundary to Quby Image Editor. Remove one distraction, compare the export against the untouched source, and publish only if the edited image remains accurate for its intended use.
Sources: Quby Image Editor and Adobe object-removal guidance.
Ready to Create with AI?
Put these techniques into practice with Quby's professional AI creative tools.
Launch Creative Suite